Index
Adding Code Lists
In this tutorial we’ll discuss how to use Internal and External Code Lists to validate element data.
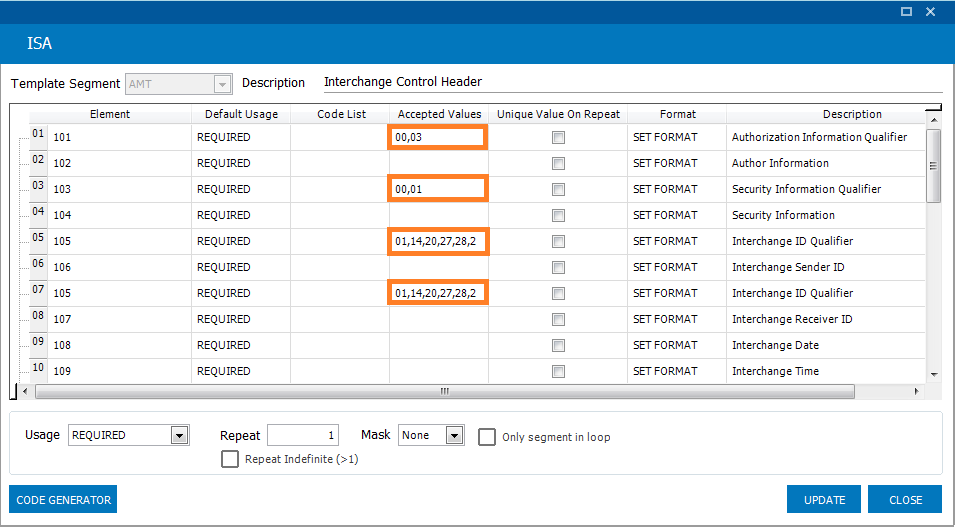
By default some EDI elements can only contain specific values. For example element 1 of segment ISA can only contain the values 00 or 03. These are referred to as accepted values for an element. Accepted values of element can be viewed in EDI Rules Creator Studio.

Accepted values can be added, removed or edited in the screen above.
Internal Code Lists are accepted value lists entered directly in your rules file in the CODELISTS section
CODELISTS
States=NY^New York,CA^California,FL^Florida
External Code List are accepted values that sit in another file in the same location as your rules file.
If we wanted to validate zip codes, countries, CPT codes, or ICD codes, for example, we could also add them using the same method. The issue, however, is that these lists are much larger. This is where external code lists enter the picture. They allow an element’s accepted values to be located in an external file.
The first step is to create an external code list. Let’s create a file called States.txt and add a few accepted values to it. Only the code is required, the description is optional
Content of States.txt
NY, New York
NJ, New Jersey
CA, California
TX, Texas
CODELISTS
States=[States.txt*,]
POSCodes=[POSCodes.txt*,]
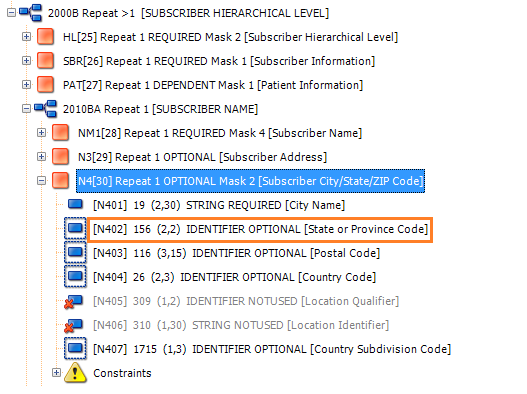
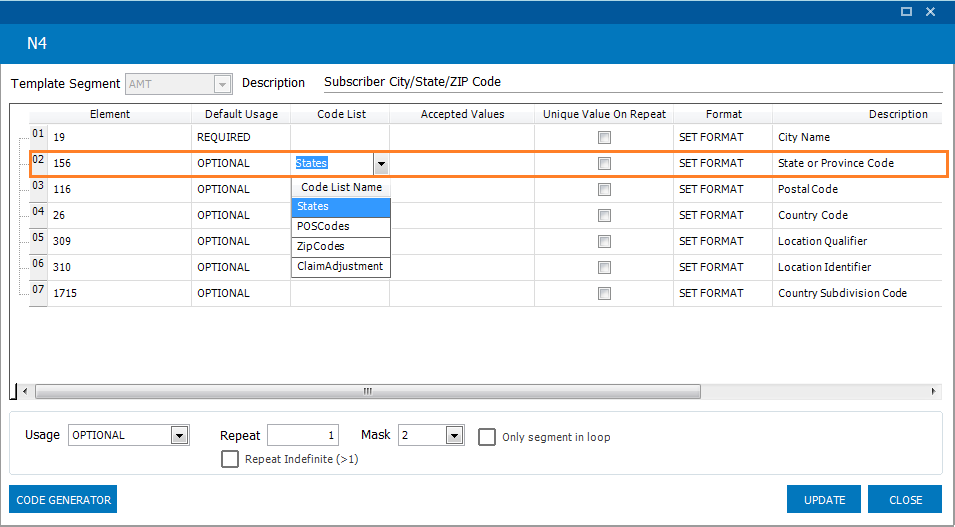
We can right-click on the segment, choose Edit Segment…, navigate to the second element (02) and select the States code list in the Code List column. We can then hit the Update button to make element 2 use the States external code list to validate its data.
Let’s check if our changes work by validating a sample file. It does!
We can now see that if a state is not in our external code list an error will be generated. We can use Code Lists to validate any type of data.
SNIP Levels
If your code list’s name starts with ‘CodeSet_’ then a SNIP Level 5 error will be generated if an element does not contain a value from the code list otherwise a SNIP Level 2 error will be generated


